Cleaning carbs
-
Acton67
- Scooter Enthusiast
- Posts: 251
- Joined: Sat May 09, 2020 9:50 pm
- My Bike: Suzuki Intruder VS800
Cleaning carbs
Considering working on this before spring. My bike runs fine but the carbs look filthy. Figured since I've got everything off the bike right now might as well. Did some research on YouTube and looked into how to synch the carbs as well. From what I understand it's important to take off both carbs with the link cable intact if you can. Doing this project scares the crap out of me to be honest but I figure I should do it since I'm basically running straight pipes since my tail pipes are aftermarket pipes that have no baffles. At this point I should be re-jetting my carbs right? Also looking to pick up quality carb kits, they've got some on Amazon but they seem cheap. Thinking of investing in a sonic cleaner for this project too, what's the minimum size needed for the carbs?
-
navigator
- Joined a 1100cc Club
- Posts: 5496
- Joined: Thu Dec 29, 2016 12:33 pm
- My Bike: VS800
Re: Cleaning carbs
Carb work can be intimidating, but it really is not that bad.
If the outside of the carbs look dirty, they can usually be cleaned up with spray carb cleaner...but that's cosmetic. It is the inside that matters.
Yes, leave the sync cable intact if at all possible.
As far as carb kits go, you really may only need the bowl gasket, and possibly the float needle and seat. everything else can be reused.
Be careful with the bowl screws, and the diaphram cover screws. They will strip easily if you use a dull phillips on them. You should use a JIS screwdriver, or you can break them loose with vicegrips, then use a screwdriver. A hand held impact driver will also help...be careful.
The interior can be cleaned with spray carb cleaner and compressed air. remove all the rubber parts.
I have one 800 that i rejetted because I am running CM2 nasty twins (straight pipes) with K&N drop ins.
I went up one jet size on the front and rear. I shimmed the stock needles with one washer.
You can buy individual mikuni jets rather cheap.
Do ONE CARB at a time because the jets, springs, and diaphrams are different.
-
Acton67
- Scooter Enthusiast
- Posts: 251
- Joined: Sat May 09, 2020 9:50 pm
- My Bike: Suzuki Intruder VS800
Re: Cleaning carbs
Lucky, I tried looking for those same pipes, can't find them online anymore. I'm running voodoo industry turn out pipes in black. I wrap my head pipes. Do you know what jet sizes specifically I should run? I swear I've seen carb kits online for the VS800 in the past with multiple jet sizes in them. Can't seem to find any online today. Any tips on where to look? I looked on Amazon and Suzuki parts warehouse. Amazon just has basic carb kits and suzuki just has individual parts, no kits. Thanks for the tips.navigator wrote: ↑Sun Feb 13, 2022 9:29 amI have one 800 that i rejetted because I am running CM2 nasty twins (straight pipes) with K&N drop ins.
I went up one jet size on the front and rear. I shimmed the stock needles with one washer.
You can buy individual mikuni jets rather cheap.
Do ONE CARB at a time because the jets, springs, and diaphrams are different.
-
navigator
- Joined a 1100cc Club
- Posts: 5496
- Joined: Thu Dec 29, 2016 12:33 pm
- My Bike: VS800
Re: Cleaning carbs
I bought the bowl gaskets and o-rings from a suzuki dealer, all oem parts, individually.
They also carry (or can order) individual Mikuni Jets.
What size you will need is very much trial and error. With CM2's I was successful going up one size.
Look at the number stamped on the side of the main jet...if it's a 140 try a 142.5 or 145.
If it's a 160 try a 162.5 for example.
I did not change the pilot jets
Here is a chart:
https://www.jetsrus.com/FAQs/FAQ_mikuni ... _sizes.htm
Make sure you buy jets for a CV carb. I forget if they were the round type or hex. You will see when you get the bowl off.
-
navigator
- Joined a 1100cc Club
- Posts: 5496
- Joined: Thu Dec 29, 2016 12:33 pm
- My Bike: VS800
Re: Cleaning carbs
After having said all that, you may not need to rejet at all.
Usually just an exhaust change doesn't warrant it.
I changed exhaust AND free flowing air filters so I jumped up one size.
The 800 is pretty optimal right out of the box.
A good carb sync will usually improve performance.
Usually just an exhaust change doesn't warrant it.
I changed exhaust AND free flowing air filters so I jumped up one size.
The 800 is pretty optimal right out of the box.
A good carb sync will usually improve performance.
-
Acton67
- Scooter Enthusiast
- Posts: 251
- Joined: Sat May 09, 2020 9:50 pm
- My Bike: Suzuki Intruder VS800
Re: Cleaning carbs
Removing the carbs went well. Most of the how to videos on YouTube mention modifying a 10mm wrench to take the throttle cables off the bike. I ended up taking the throttle cable apart at the 3 way joiner and then pulling the carbs off the bike with the lower parts of the throttle cable still on the carbs. Way easier that way.
Ran one of the carbs through the ultrasonic cleaner already. There was at least 30yrs of filth on them. Ended up changing out the air filters too. There was an old mouses nest in the rear air box next to the old filter. Couldn't get the diaphragm cover off, but the float bowl came off easily. Read through this topic again, will try to use vice grips tomorrow. Used simple green in the ultrasonic cleaner after letting both carbs soak in carb cleaner for an hour. Wasn't sure if it was safe to use carb cleaner in the ultrasonic cleaner. Hit both carbs with the air compressor.
Will need to run new fuel hose from carb #1 to carb #2. What size is the fuel hose?
-
Herb

- Joined a 1200cc Club
- Posts: 19277
- Joined: Sun Oct 26, 2014 9:28 pm
- My Bike: 1999 1400 intruder
Re: Cleaning carbs
Carb cleaner with any rubber parts is a bad thing. I hope the diaphragms are not damaged.
The screws on the cover are rounded and vice grips don't want to grab on them.
When I have a problem with screws, like the ones on the diaphragm cover, I use a small chisel on the edge of the screw to turn the screw, usually only needs to barely turn the screw to be able to remove the screw with a screw driver.
I can't seem to win the lottery. I think I have used up all of my good luck riding motorcycles.
-
hillsy

- Joined a 1200cc Club
- Posts: 8846
- Joined: Wed Sep 17, 2014 12:43 am
Re: Cleaning carbs
Hoping you didn't run this carb in the ultrasonic with the diaphragm still in? Also what Herb said about soaking the diaphragms in carb cleaner is not a good thing (unclear if you did that).
-
Acton67
- Scooter Enthusiast
- Posts: 251
- Joined: Sat May 09, 2020 9:50 pm
- My Bike: Suzuki Intruder VS800
Re: Cleaning carbs
I did run the carb in the ultrasonic cleaner with the diaphragm still in. Just ordered a new diaphram for $30. Looks like I've got no choice but to get the diaphram cover off now. What kind of chisel are we talking about? Might as well pick up new diaphram cover screws too..
What size fuel line do I need for the fuel line running from the rear to front carbs?
-
hillsy
- Joined a 1200cc Club
- Posts: 8846
- Joined: Wed Sep 17, 2014 12:43 am
Re: Cleaning carbs
Chisel for removing the stuck diaphragm cover screw? Be careful trying to hit that with a chisel - you can easily crack the carb body and end up with a much bigger problem.
See if you can get a small pair of Vice Grips on the screw head and turn - you only need to "crack" the screw open then it should come out pretty easy.
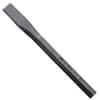
These can be handy in shorter variants:

See if you can get a small pair of Vice Grips on the screw head and turn - you only need to "crack" the screw open then it should come out pretty easy.
These can be handy in shorter variants:
-
Acton67
- Scooter Enthusiast
- Posts: 251
- Joined: Sat May 09, 2020 9:50 pm
- My Bike: Suzuki Intruder VS800
Re: Cleaning carbs
Was referring to what Herb said. I will pick up a pair of those too.hillsy wrote: ↑Sun Feb 27, 2022 5:18 pmChisel for removing the stuck diaphragm cover screw? Be careful trying to hit that with a chisel - you can easily crack the carb body and end up with a much bigger problem.
See if you can get a small pair of Vice Grips on the screw head and turn - you only need to "crack" the screw open then it should come out pretty easy.
These can be handy in shorter variants:
Herb wrote: ↑Sun Feb 27, 2022 3:34 pmCarb cleaner with any rubber parts is a bad thing. I hope the diaphragms are not damaged.
The screws on the cover are rounded and vice grips don't want to grab on them.
When I have a problem with screws, like the ones on the diaphragm cover, I use a small chisel on the edge of the screw to turn the screw, usually only needs to barely turn the screw to be able to remove the screw with a screw driver.
-
hillsy
- Joined a 1200cc Club
- Posts: 8846
- Joined: Wed Sep 17, 2014 12:43 am
Re: Cleaning carbs
Yes the screw heads are rounded but you can still get a pair of Vice Grips on them most of the time if the nose ends are small enough. You could also probably use a Dremel with a small cutting disc to cut a slot for a flat blade screwdriver but I've never done that personally. Another option is to drill the head off the screw and then you can grab the remains of the screw shoulder when the cap is off.
-
Herb
- Joined a 1200cc Club
- Posts: 19277
- Joined: Sun Oct 26, 2014 9:28 pm
- My Bike: 1999 1400 intruder
Re: Cleaning carbs
The screws on the top of the carb are very small and have a rounded top. Vise grips have a tendency to pop off of them.
I use something like the smallest one of these.
https://www.homedepot.com/p/URREA-1-4-i ... /202797873
first take the chisel and use it pointed straight at the center of the screw to cut an indent into the screw so the chisel can bite into it. Then move it to the point that you are trying to move it in the direction you want to turn the screw, about a 3rd of the edge of the screw, tap it with a small amount of force and keep increasing the force until the screw moves. It doesn't usually take much force to get them to move.
I can't seem to win the lottery. I think I have used up all of my good luck riding motorcycles.
-
98VS1400
- Site Admin
- Posts: 39
- Joined: Sat Sep 13, 2014 12:02 pm
- My Bike: None of your business
Re: Cleaning carbs
Buy yourself a set of JIS screwdrivers. They aren’t that expensive and you’ll appreciate having them for any screw on the bike. I have a set of 3 and I think it cost me like $20 or something. Well worth the money.
-
Acton67
- Scooter Enthusiast
- Posts: 251
- Joined: Sat May 09, 2020 9:50 pm
- My Bike: Suzuki Intruder VS800
Re: Cleaning carbs
Ended up getting the screws off with a chisel. I actually had a 2" wide chisel that I've been using as a scraper that worked. I picked it up for another project last year because it was nice and stiff and wasn't flimsy like most scrapers. Realized it's really a chisel because it has an impact head. Worked like a charm! My uncle in law has a HD Wide Glide with rusted head pipe studs. We didn't want to try to take the nuts off because we were afraid of snapping the studs off if we put to much torque on them. Thinking of hitting them with WD40 for a few days and then trying the chisel on them. Seems like there would be much less risk of accidently snapping the studs that way instead of trying to crack them free with a wrench.
Realized the carb actually has 2 diaphragms. Removed both and dried them. They don't seem to be damaged in any way or warped. Ordered some new screws for the diaphragm cover and float bowl. Managed to get the pin out of the rear carb float without any issue. Was able to remove the retaining screw that held in the float needle seat but stripped out the screw in the process. Had to use the chisel on it as well. Ordered a new screw for that. Carb kit didn't come with new metal mesh filters that go on the bottom of the float needle seat, but it did come with an O-ring for the float needle seat. It came with a bigger O-ring for the choke and a really small O-ring. Looked around on YouTube and no one seems to know what that O-ring is for.
Realized the carb actually has 2 diaphragms. Removed both and dried them. They don't seem to be damaged in any way or warped. Ordered some new screws for the diaphragm cover and float bowl. Managed to get the pin out of the rear carb float without any issue. Was able to remove the retaining screw that held in the float needle seat but stripped out the screw in the process. Had to use the chisel on it as well. Ordered a new screw for that. Carb kit didn't come with new metal mesh filters that go on the bottom of the float needle seat, but it did come with an O-ring for the float needle seat. It came with a bigger O-ring for the choke and a really small O-ring. Looked around on YouTube and no one seems to know what that O-ring is for.
-
hillsy
- Joined a 1200cc Club
- Posts: 8846
- Joined: Wed Sep 17, 2014 12:43 am
Re: Cleaning carbs
The really small o ring will be for your idle mixture screw. If it didn't come out when you unscrewed it will be in the carb body still. You will need to hook it out. There is a spring and a tiny washer as well.
Like this....

Like this....
-
Herb
- Joined a 1200cc Club
- Posts: 19277
- Joined: Sun Oct 26, 2014 9:28 pm
- My Bike: 1999 1400 intruder
Re: Cleaning carbs
WD-40 works but I like PB Blaster better for rusted nuts and bolts.Acton67 wrote: ↑Tue Mar 01, 2022 9:01 pmEnded up getting the screws off with a chisel. I actually had a 2" wide chisel that I've been using as a scraper that worked. I picked it up for another project last year because it was nice and stiff and wasn't flimsy like most scrapers. Realized it's really a chisel because it has an impact head. Worked like a charm! My uncle in law has a HD Wide Glide with rusted head pipe studs. We didn't want to try to take the nuts off because we were afraid of snapping the studs off if we put to much torque on them. Thinking of hitting them with WD40 for a few days and then trying the chisel on them. Seems like there would be much less risk of accidently snapping the studs that way instead of trying to crack them free with a wrench.
Realized the carb actually has 2 diaphragms. Removed both and dried them. They don't seem to be damaged in any way or warped. Ordered some new screws for the diaphragm cover and float bowl. Managed to get the pin out of the rear carb float without any issue. Was able to remove the retaining screw that held in the float needle seat but stripped out the screw in the process. Had to use the chisel on it as well. Ordered a new screw for that. Carb kit didn't come with new metal mesh filters that go on the bottom of the float needle seat, but it did come with an O-ring for the float needle seat. It came with a bigger O-ring for the choke and a really small O-ring. Looked around on YouTube and no one seems to know what that O-ring is for.
I can't seem to win the lottery. I think I have used up all of my good luck riding motorcycles.
-
Lechy
- Joined a 1000cc Club
- Posts: 3967
- Joined: Tue Dec 09, 2014 9:58 pm
- My Bike: VS800 Honda Phantom 200

-
hillsy
- Joined a 1200cc Club
- Posts: 8846
- Joined: Wed Sep 17, 2014 12:43 am
-
Designer

- Joined a 1200cc Club
- Posts: 17404
- Joined: Tue Sep 16, 2014 8:34 am
- My Bike: Two 1400 Custom Made Choppers
Re: Cleaning carbs
Herb wrote: ↑Tue Mar 01, 2022 10:37 pmWD-40 works but..... I like PB Blaster better for rusted nuts and bolts.[/b]Acton67 wrote: ↑Tue Mar 01, 2022 9:01 pmEnded up getting the screws off with a chisel. I actually had a 2" wide chisel that I've been using as a scraper that worked. I picked it up for another project last year because it was nice and stiff and wasn't flimsy like most scrapers. Realized it's really a chisel because it has an impact head. Worked like a charm! My uncle in law has a HD Wide Glide with rusted head pipe studs. We didn't want to try to take the nuts off because we were afraid of snapping the studs off if we put to much torque on them. Thinking of hitting them with WD40 for a few days and then trying the chisel on them. Seems like there would be much less risk of accidently snapping the studs that way instead of trying to crack them free with a wrench.
Realized the carb actually has 2 diaphragms. Removed both and dried them. They don't seem to be damaged in any way or warped. Ordered some new screws for the diaphragm cover and float bowl. Managed to get the pin out of the rear carb float without any issue. Was able to remove the retaining screw that held in the float needle seat but stripped out the screw in the process. Had to use the chisel on it as well. Ordered a new screw for that. Carb kit didn't come with new metal mesh filters that go on the bottom of the float needle seat, but it did come with an O-ring for the float needle seat. It came with a bigger O-ring for the choke and a really small O-ring. Looked around on YouTube and no one seems to know what that O-ring is for.
I second that, Herb.
And I found it Works better than Liquid Wrench .

Time To Ride Country Two Laners.
CENSORSHIP IS WHAT TYRANTS RESORT TO WHEN THEIR LIES LOOSE THEIR POWER.
Si vis pacem, para bellum!